
 Tiếng Việt
SketchUp
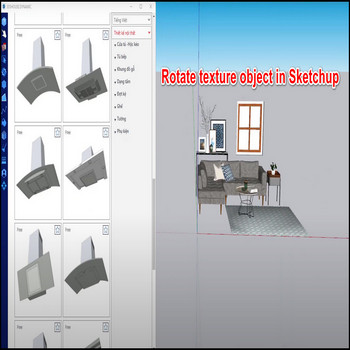
Rotate Texture in SketchUp — Position Texture Tool Guide
Oct
Rotating a texture on a single face in SketchUp without disturbing neighboring surfaces is one of those tasks that looks simple but catches many users off guard. The built-in Position Texture tool — accessed by right-clicking any textured face and choosing Texture → Position — gives you complete control over rotation, scale, and position on a per-face basis. Because SketchUp stores UV mapping independently on each face, you can spin a wood-grain material to follow the geometry on one polygon while every adjacent face keeps its original mapping untouched. This makes Position Texture the correct approach whenever you need a tile pattern to run at an angle, a fabric grain to align with a curved profile, or a logo decal to sit at exactly the right orientation. The tool has been available since early SketchUp versions and remains unchanged through the current SketchUp 2026 release, so the workflow applies whether you are on a decade-old install or the latest subscription build. Understanding how its four colored pins work — and knowing the two most common traps (Free Pins mode and the group edit-context requirement) — turns texture rotation from a frustrating guessing game into a reliable, repeatable operation. This guide walks through every step in detail, explains each pin’s role, covers the projected-texture trick for keeping consistent orientation across multiple faces, and answers the questions that come up most often in practice.
Key Features
- Per-face UV rotation with no side effects. SketchUp’s UV mapping is stored per face, not per object. Rotating the texture on one face using Position Texture changes only that face’s UV data. Adjacent faces — even faces that share an edge with the one you edited — keep their own independent mapping. This is the fundamental reason you can rotate a parquet floor tile on a tabletop without the table legs or apron changing angle.
- Fixed Pins mode: four pins, four distinct operations. In Fixed Pins mode each colored pin handles a different transformation. The red pin moves the texture origin without rotating or scaling — drag it to shift the entire pattern left, right, up, or down. The green pin controls rotation and uniform scale simultaneously — drag it around the red pin to spin the texture, or drag it toward/away from red to zoom in or out. The blue pin scales on one axis only and introduces shear — useful for anisotropic stretching. The yellow pin distorts the texture in perspective, pulling one corner independently. For a clean rotation with no distortion, use only the green pin.
- Precise angle snapping via right-click Rotate. Instead of dragging the green pin freehand, right-click anywhere on the texture grid while Position Texture is active and choose Rotate 90° (or 180°, 270°). The texture snaps to exactly that increment with no drift. For angles other than those multiples, drag the green pin while watching the angle readout in the bottom status bar — SketchUp displays the current rotation in degrees, and you can lock to a value by typing the number and pressing Enter before clicking.
- Free Pins mode for projections and perspective mapping. Right-clicking inside the Position Texture grid toggles between Fixed Pins and Free Pins. In Free Pins mode the four pins move independently — there is no geometric constraint linking them. This is the correct mode when you need to drape a texture over a non-rectangular face, match photo-texture to real geometry, or project an image onto an irregular polygon. If your texture appears to shear or distort unexpectedly during rotation, you have most likely slipped into Free Pins mode accidentally; right-click → Fixed Pins resets the constraint.
- Projected texture sampling for multi-face alignment. When you need the same grain or pattern direction to continue across several connected faces — for example a long wooden plank that wraps over a curved profile — paint the first face, set its rotation with Position Texture, then sample that face with the Paint Bucket tool while holding Alt (Mac: Command). SketchUp loads the material in projected-texture mode. Paint the adjacent faces with this sampled material and the pattern flows continuously across them, preserving the angle you set on the first face.
- Group and component context requirement. Position Texture is greyed out in the right-click menu whenever the face you are trying to edit belongs to a group or component that is not currently open for editing. You must double-click into the group or component to enter its edit context before right-clicking the face. Rotating the group or component object at the scene level never rotates the UV mapping — the material moves with the geometry but the angle relative to the face stays the same.
How to Install and Use
Position Texture is a native SketchUp tool — no extension download or installation is required. The steps below cover the complete workflow from selecting the face to confirming the final rotation.
- Apply a texture material to the face first. If the face is unpainted or painted with a solid color, Position Texture will not appear in the right-click menu. Open the Materials panel (Window → Materials), choose or import a texture material, and paint the target face with the Paint Bucket tool. Any built-in SketchUp material that shows a bitmap image counts as a texture.
- Enter the group or component edit context if needed. If the face is inside a group or component, double-click the group to enter its edit context. The bounding box turns blue-dashed. If the group is nested inside another group, double-click again to go deeper. You must reach the level where the face itself is directly editable before proceeding.
- Right-click the textured face and choose Texture → Position. A grid of colored pins appears over the face. The texture becomes semi-transparent to make the pins visible. If you do not see Texture in the context menu, the face is not textured, or you are not in the correct edit context.
- Check that you are in Fixed Pins mode. Right-click anywhere on the texture grid. If the menu shows Free Pins (without a checkmark), you are already in Fixed Pins mode — good. If it shows Fixed Pins with a checkmark, click it to switch. Fixed Pins enforces the geometric relationship between the four pins and prevents accidental shear during rotation.
- Rotate using the green pin. Click and drag the green pin (located to the right of the red origin pin) in an arc around the red pin. Watch the angle displayed in the status bar at the bottom of the SketchUp window. Release the mouse when you reach the target angle. For a freehand drag, hold Shift to constrain to 15° increments (this standard SketchUp modifier works inside Position Texture as well).
- Or use right-click Rotate for exact 90° steps. Right-click anywhere on the grid (not on a pin) and select Rotate 90°, Rotate 180°, or Rotate 270°. Each click accumulates — two consecutive Rotate 90° commands produce a 180° total rotation. This method is faster and more reliable than dragging for common quarter-turn adjustments.
- Reposition and scale if needed. After setting the rotation, drag the red pin to shift the origin so the pattern tiles from the desired starting point. To scale uniformly, drag the green pin radially away from or toward the red pin instead of rotating it.
- Confirm the change by pressing Enter or clicking outside the texture grid. The pins disappear and the texture is locked at the new angle. Press Escape instead to cancel and revert the face to its previous mapping.
- Repeat per face as required. Each face on the model stores its mapping independently. If you want the same angle on multiple faces, position the texture on the first face, sample it in projected mode (Alt + Paint Bucket on the source face), then paint the other faces.
Pro Tips
- Type the exact rotation angle before releasing the mouse. While dragging the green pin, type a number (for example 45) and press Enter. SketchUp applies that angle exactly, measured from the default horizontal. This is the fastest path to non-standard angles like 30° or 22.5° without counting pin movements.
- Sample projected texture to span multiple faces with one operation. Position Texture on the first face, set the angle, press Enter to confirm. Switch to the Paint Bucket tool, hold Alt (Mac: Command), and click that face to sample its material in projected mode. The cursor icon changes to show an eyedropper with an arrow. Now paint every adjacent face you want to share the same mapping direction. The texture will read as a continuous field across all painted faces rather than resetting at each face boundary — ideal for wooden surfaces, stone cladding, or any material where grain direction matters.
- Use Undo (Ctrl+Z) freely inside Position Texture. Each drag or right-click Rotate inside the Position Texture session is individually undoable after you confirm the change. If you confirm by mistake, Ctrl+Z immediately after exits the tool and restores the previous mapping. This makes experimenting with angles risk-free.
- Avoid rotating at the object (group) level for texture alignment. A common mistake is rotating the entire group thinking the UV mapping will follow differently — it does not. The material rotates visually with the geometry but the face-relative UV angle stays the same. If you want the visual pattern on the face to appear at a different angle, use Position Texture on the face itself inside the edit context, not the Rotate tool on the group.
- Check your texture resolution before fine-tuning angles. Very low-resolution textures (below 512×512 px) show obvious pixelation when rotated to non-axis-aligned angles because SketchUp scales the bitmap to the face size during UV calculation. If the rotated result looks blurry or blocky, replace the material with a higher-resolution source image (1024×1024 or larger) before committing the angle. This is especially noticeable on large architectural faces like floor planes and wall surfaces.
System Requirements
- SketchUp version: SketchUp 2017 or later (Position Texture has been available since much earlier; this guide was verified on SketchUp 2022–2026)
- Operating system: Windows 10/11 or macOS 11 Big Sur and later
- Extension required: None — Position Texture is a built-in SketchUp native tool
- License: Available in SketchUp Free (web), SketchUp Go, SketchUp Pro, and SketchUp Studio