Tiếng Việt
SketchUp
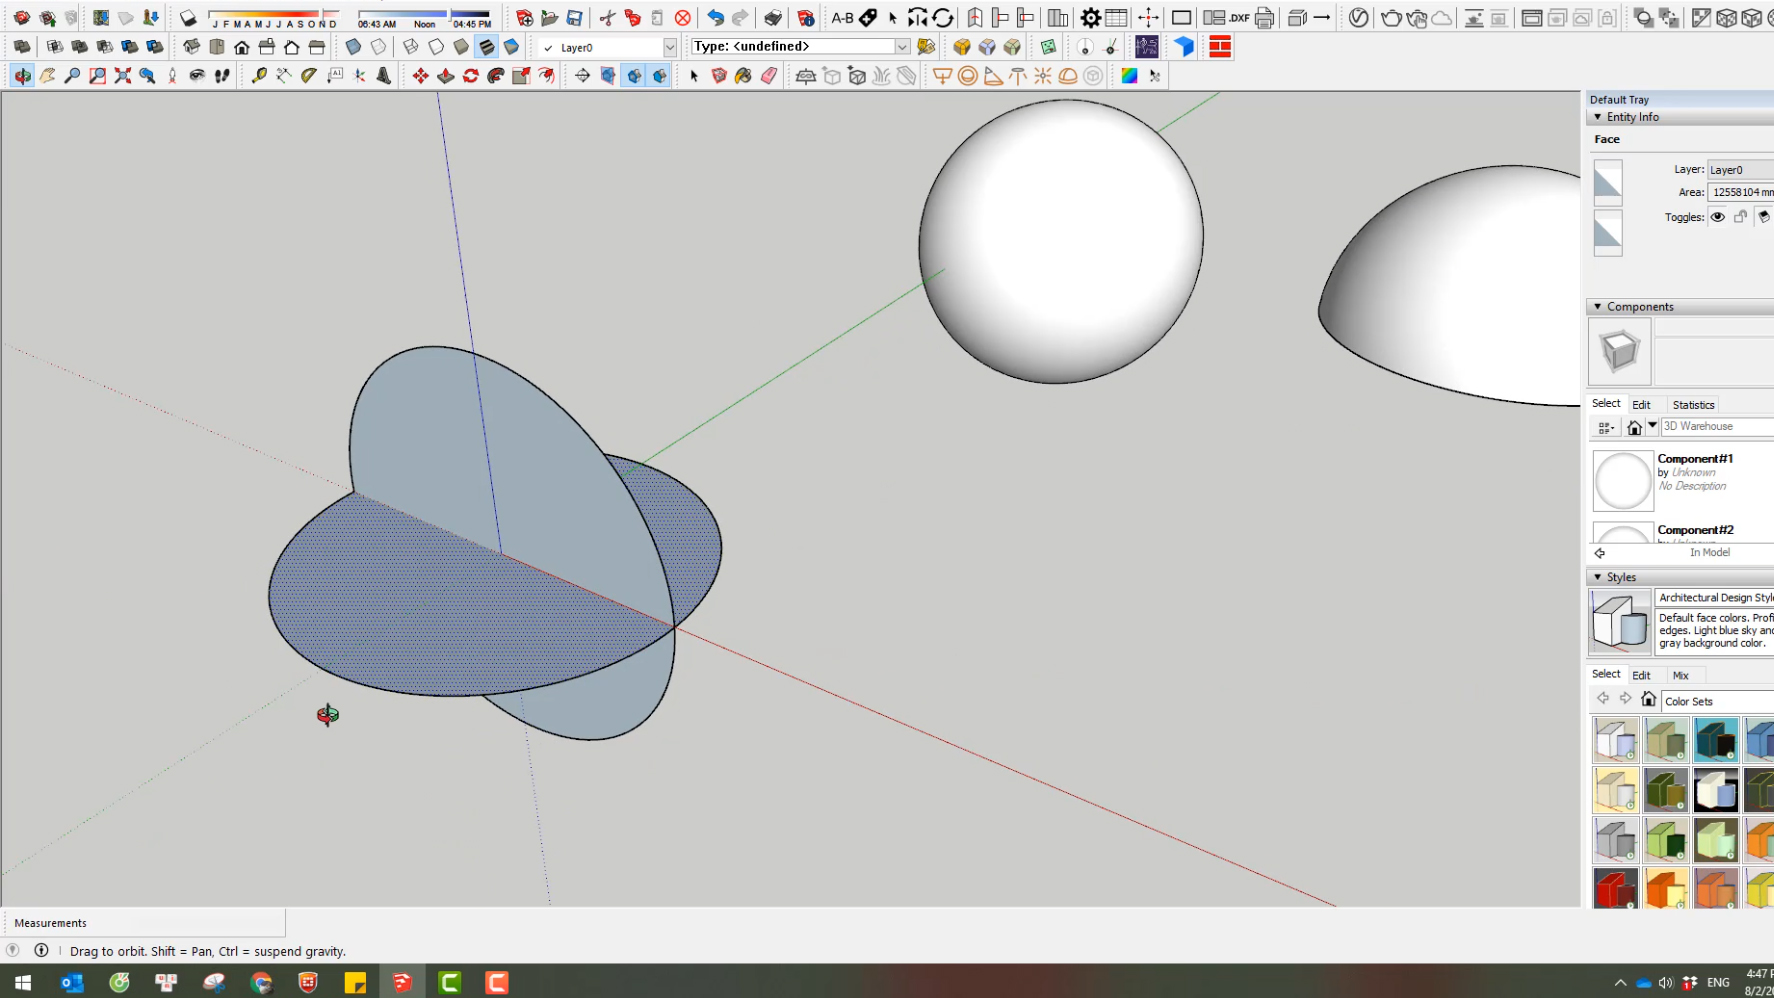
How to Create a Sphere, Hemisphere & Dome in SketchUp

Aug
Do you believe that you can simply use SketchUp’s native Follow Me tool to create spheres, hemispheres, and domes?
3dshouse will show you the way to create them easily.
These steps use only the native Follow Me tool, so they work in every modern SketchUp release, including the current subscription-based SketchUp 2026 (no extra extension required).
Steps to Create a Sphere, Hemisphere & Dome in SketchUp Using Follow Me
- Spheres:
- First, create a circle with your desired sphere radius.
- At the center of the first circle, create another circle perpendicular with the first circle’s plane.
- Delete first circle’s plane.
- Select the path (first circle)
- Activate the Follow Me tool ( or choose Tools, Follow Me)
- Click the second circle plane
- Right click and select the “Intersect Faces” tab. Now, we have a Sphere
Gotcha worth knowing: revolving the perpendicular circle a full 360° around the path circle already closes the sphere by itself — the extra “Intersect Faces” step is only needed if your two circles are not perfectly concentric and you want to clean up stray geometry. Set the segment count BEFORE you draw the circles, because once a circle becomes 3D geometry you can no longer change its sides. Type a number then press Enter before drawing, or select a finished circle and type e.g. 48s in the Measurements box while it is still flat. Both the profile circle AND the path circle contribute to smoothness, so two 24-side defaults give a chunky, faceted ball — bump both to 48 or 64 for a smooth surface (each step roughly doubles the polygon count, so don’t overdo it on large scenes).
- To create a SketchUp hemisphere, create a circle with your desired radius.
- At the center of the created circle, create another circle perpendicular with the first circle’s plane.
- Delete the planes and lines that are not needed
-
Select the path (first circle)
- Activate the Follow Me tool
- Click the face of hemisphere and Intersect Faces. Done!
For a hemisphere you sweep only the top half-arc of the profile around the full path circle. Pre-selecting the path edges first, then activating Follow Me and clicking the profile face, is far more reliable than the click-and-drag method — it stops the tool from wandering onto neighbouring geometry and producing a half-finished or doubled surface.
- To create a dome, execute the same steps as creating a hemisphere.
- Here, select the hemisphere plane, select the Offset tool.
- Type a number and the Imperial, then press Enter
- Add and delete lines to create an enclosed boundary base for the dome.
- Select the path, activate the Follow Me tool
- Click the face of section dome and Intersect Faces.
The Offset value can be entered in any unit you have set in Model Info (metric or imperial) — just type the number followed by the unit and Enter. If the resulting sphere or dome shows visible facet lines, don’t re-draw it: select the surface, right-click and choose Soften/Smooth Edges, then push the angle slider up so the curvature reads as smooth shading — the underlying polygon count is unchanged, only the edge display is softened.