
 Tiếng Việt
SketchUp
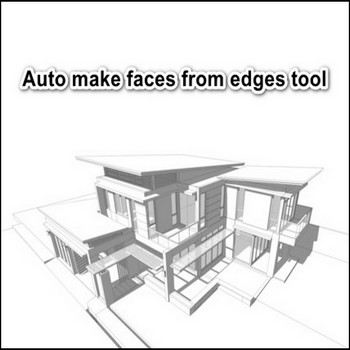
Auto Create Faces from Edges in SketchUp (1 Click)
Oct
When you trace the outline of a building wall in SketchUp, every closed edge loop that lies on a single plane instantly fills with a face — no extra click required. That behavior is SketchUp’s built-in auto-create-face engine, and it is the fastest path from raw edge work to a solid model. But there is a smarter layer on top: the Face Creator plugin (by ThomThom and similar tools on Extension Warehouse) detects existing closed coplanar edge loops in your scene and fills every one of them with a planar face in a single operation. Instead of hunting for missing faces one by one, you select all your edges, run the plugin, and every valid loop gets a face simultaneously. This matters most when you import a 2D DWG floor plan, trace a complex site boundary, or recover faces from a model that lost its surfaces due to explode or scale operations. The auto-create-face workflow cuts what used to be minutes of remedial redrawing into a few seconds. This guide covers SketchUp’s native face-generation rules, the plugin layer that automates bulk face creation, and the non-obvious diagnostic tricks that matter when a face stubbornly refuses to appear.
Key Features
- Instant closed-loop detection across the entire selection — The plugin scans every edge in your selection, groups them into candidate loops, and tests each group for coplanarity before filling. Unlike the native engine (which only fires when you complete the final closing edge in real time), the plugin works retroactively on geometry that already exists, catching loops you drew earlier or imported from another source.
- Handles nested and overlapping loops correctly — A floor plan often has a large outer perimeter with interior wall outlines cutting through it. The plugin respects nesting: it fills inner loops first, then outer loops that are bounded by those inner edges, producing the correct void-within-a-face structure that Push/Pull needs to create openings like doors and windows.
- Works inside Components and Groups without exploding — You can enter a group or component, select edges, run Face Creator, and exit. The host context remains intact. This is critical when you are repairing one room of a multi-room floor plan model where exploding the geometry would break associations and layer assignments.
- Recovers faces lost after boolean or explode operations — Boolean intersections and the Explode command frequently destroy face data while leaving the bounding edges perfectly intact. Face Creator rebuilds all recoverable faces in one pass, making it a standard recovery step after any intersection workflow.
- Diagonal-test bypass for near-coplanar failures — When edges are close to coplanar but fail the strict planarity test (common on imported or hand-traced geometry), the native engine silently does nothing. The plugin reports which loops failed and why, giving you a specific target to fix rather than a blank model.
- No face is created for non-planar or open loops — The plugin is conservative: if a loop has even one vertex off-plane it skips that loop entirely rather than creating a warped face. This keeps your geometry clean — warped faces cause rendering artifacts and Solid Inspector failures downstream.
How to Install and Use
- Find the plugin on Extension Warehouse. Open SketchUp, go to Extensions > Extension Warehouse, and search for “Face Creator” (by ThomThom) or “Create Faces” (by Tig). Both are free. Click Install and allow SketchUp to restart if prompted.
- Alternatively install via .rbz file. Download the .rbz from the author’s GitHub or Sketchucation page. In SketchUp go to Extensions > Extension Manager > Install Extension, navigate to the .rbz, and click Open. The plugin appears immediately — no restart required for most versions.
- Prepare your geometry. The plugin works best on clean edge networks. Before running it, turn on View > Hidden Geometry to check for stray soft edges, duplicate coplanar edges, or tiny gaps at corners. A gap as small as 0.01 inches breaks a loop. Use the Tape Measure tool or the Vertex Tools extension to snap endpoints that are visually touching but numerically separate.
- Select the edges you want filled. Triple-click a group or component to select all edges in it, or rubber-band select a region. You can also select all (Ctrl+A) if the entire model is edge-only geometry. The plugin ignores edges that already bound a face on both sides.
- Run the plugin. Go to Extensions > Face Creator > Create Faces (the exact menu path depends on the plugin version). A status bar message reports how many faces were created and how many loops were skipped. If the count is lower than expected, proceed to the diagnostic steps below.
- Check face orientation immediately. New faces frequently generate with the back face (blue-grey side) facing outward. Select all new faces, right-click, and choose Orient Faces or Reverse Faces as needed. Fixing orientation now takes seconds; fixing it after Push/Pull extrusions takes much longer because you have to reverse each extruded solid face individually.
- Delete interior faces you do not need. On a floor plan, the plugin creates faces for every closed sub-loop, including partition wall outlines within a larger room boundary. Select and delete the interior faces to leave only the perimeter face with holes, which is the correct topology for a floor slab with door openings.
- Push/Pull to extrude. With faces created and oriented, use Push/Pull to give walls, slabs, and columns their 3D depth. Because every face was created from exact edge loops, Push/Pull produces watertight solids compatible with SketchUp’s Solid Tools and with export to IFC or STL.
Pro Tips
- Use the diagonal-line diagnostic before running the plugin. If the plugin reports a loop as skipped, draw a temporary diagonal line across the suspected area. If a face appears when you add the diagonal, your loop was split across two slightly different planes. Identify which vertex is off-plane (usually an imported DWG vertex that snapped to a slightly different Z), move it to the correct elevation, delete the diagonal, and run the plugin again. This single trick solves 80% of missing-face problems on imported geometry.
- Re-trace one edge to recover a single accidentally deleted face. You do not need the plugin for a single missing face. Pick the Line tool, click from one endpoint to the adjacent endpoint along an existing edge of that loop — SketchUp recomputes the loop and regenerates the face in real time. This is faster than selecting and running the full plugin pass when only one face is missing.
- Combine with CleanUp³ before running on imported DWGs. DWG imports often contain duplicate edges, zero-length edges, and edges that nearly overlap but do not share endpoints. Run CleanUp³ (ThomThom, free) with “Merge Coplanar Faces” and “Erase Stray Edges” enabled before Face Creator. CleanUp³ fixes the topology; Face Creator then fills cleanly on the first attempt instead of requiring multiple diagnostic passes.
- Work inside Components to avoid global intersections. If you run Face Creator on raw (ungrouped) geometry in a complex scene, new faces may interact with existing geometry and trigger unwanted boolean intersections. Always wrap edge networks in a group or component first, run the plugin inside that context, then exit. The host model geometry is unaffected.
- Check View > Hidden Geometry for soft edges blocking face creation. When a face was previously smoothed (part of a curved surface), SketchUp stores its bounding edges as soft/smooth. If that face is later deleted, the soft edges remain but are invisible in normal view. The bounding loop looks open even though all edges are present. Turn on Hidden Geometry, select those soft edges, and uncheck Soft and Smooth in the Entity Info panel — they become normal hard edges and the loop fills correctly.
System Requirements
- SketchUp version: SketchUp 2017 or later (Face Creator by ThomThom); SketchUp 2022 or later recommended for full Ruby API compatibility with newer plugin builds.
- Operating system: Windows 10/11 (64-bit) or macOS 10.15 Catalina and later.
- Native auto-face behavior: Available in every version of SketchUp including the free SketchUp for Web — no plugin required for the basic real-time face generation.
- Extension Warehouse account: Required to install directly from within SketchUp. Manual .rbz install does not require an account.