Revit keeps a fill pattern, also called a hatch pattern, inside the project: a repeating layout of lines that it draws on a material, a filled region or a category override. There are two kinds, drafting and model, and a pattern reaches a project from Revit’s own pattern dialog or from a .pat file. This page explains how Revit stores the two kinds, the steps of the import, what the units and type lines of the file do, and the message Revit gives when the Pattern Type does not match the file.
Drafting and model: the two kinds
Autodesk’s help puts the difference in how the pattern relates to the drawing:
- Drafting pattern: represents a material in symbolic form (sand as a stipple), typically on cut surfaces. Its density is fixed on the drawing sheet, so it keeps its size on paper when the view scale changes.
- Model pattern: represents the actual appearance of an element (brick coursing, ceramic tile, parquet). It is fixed to the model, so it grows and shrinks with the view scale. In the basic pattern dialog, a drafting pattern’s spacing is spacing on the sheet and a model pattern’s is spacing on the model.
Zooming out far enough turns any pattern into a solid fill: Autodesk calls it pattern overscaling. For materials, Autodesk says the Surface Pattern foreground takes a drafting or a model pattern and the background a drafting pattern only. Tested by the Motif team in Revit 2023: the Cut pattern also accepts a drafting fill pattern only, and Revit refused a model pattern there with the message “The FillPattern target must be a drafting pattern”.
Where the patterns in a project come from
- Revit’s own. Revit includes several of its own and stores them in the default project template. A fill pattern is stored in the project file in which it was created; to have it in future projects, create it in your template, or move it between projects with Transfer Project Standards.
- Revit’s sample .pat files. Two sit in the Data folder:
revit.patandrevit metric.pat(the metric file holds various metric masonry and ISO patterns); Autodesk’s 2025 help gives%ProgramFiles%\Autodesk\Autodesk Revit 2025\Data. Two more,acdb.patandacdbiso.pat, are in the ACADInterop folder. - Basic patterns you build in Revit. The basic pattern is “a series of parallel or orthogonal lines” (Parallel lines or Crosshatch), enough for a plain grid; a herringbone, a staggered brick bond or a mosaic needs a pattern file.
- Your own or downloaded .pat files. A custom file can be stored in any location, must have the PAT extension, and is not referenced again after Revit imports it. To download one from another source, check the header lines described below before you rely on it.
Importing a .pat file, step by step
Autodesk’s steps (Revit 2025 help):
- Click Manage > Settings > Additional Settings > Fill Patterns.
- In the Fill Patterns dialog, under Pattern Type, select Drafting or Model.
- Click New. In the New Pattern dialog set Type to Custom, click Browse, pick the .pat file and click Open.
- Select the pattern you want (Search filters the list). You can rename it and enter an Import scale; for a drafting pattern you also choose how it is oriented in the host layers.
- Click OK twice.
To use it, set it as a material’s Surface or Cut pattern on the Graphics tab, or apply it to a filled region, or override a category’s fill pattern in Visibility/Graphics (Autodesk, Apply a Fill Pattern). Which of the two kinds each of those places takes is set out in the drafting and model pair for filled regions and materials. If a pattern imports but does not show, or looks too dense, go to the cut pattern and scale checklist.
Inside the file: the lines Revit reads
Autodesk’s format page lists a units line ;%UNITS=, a name line *name, optional description, a type line ;%TYPE=MODEL, and descriptor lines with angle, x-origin, y-origin, shift and spacing, in that order. A forum reply (Autodesk Community, 2025) quotes a herringbone from Revit’s own file as an example of the layout, not as documentation, so compare it with the file in your installation:
*HerringBone 2x6, brick herringbone
;%TYPE=MODEL
45, 0, 0, 2, 2, 6, -2
135, 1.414, 1.414, 2, -2, 6, -2
The header of the revit.pat that ships with Revit (read by the Motif team in Revit 2023) adds the rules that matter on import:
- Units.
;%UNITS=INCHor;%UNITS=MMis written once, before the first pattern. Without it Revit assumes inches, and units in the file are preferred to the Import scale. - Version. Both shipped files carry
;%VERSION=3.0, which the header asks you to include for future compatibility. - Type. The
;%TYPE=DRAFTINGor;%TYPE=MODELline sits on the line after the name. Without it Revit assumes a drafting pattern. - Names and lines. A name may contain any ASCII character except a comma, spaces included; the comma and the description after it are ignored. Lines must be shorter than 4096 characters, a descriptor has no limit on its dash count, one file may hold many patterns, and a zero offset is not allowed.
- Errors. A file with an error is not imported and Revit names the erroneous line; a pattern too dense for its Import scale may be refused, with a hint to change the scale or the definition.
The Pattern Type choice: a filter on the file
Revit filters the patterns of the file by their type line against the Pattern Type chosen in the dialog; if none has the type you picked, it answers No “Model” type patterns found. or No “Drafting” type patterns found. and imports nothing. Nothing is converted. The message strings are in Revit 2023’s own resources, and Autodesk Community replies describe the same two fixes: change the type line in the file, or import with the other Pattern Type. Those replies add that an untyped AutoCAD pattern imports as Drafting without edits and needs ;%TYPE=MODEL to import as Model. The same message has also been reported for a model pattern with a zero offset or a missing shift value, so it names the result of the filter, not only the type.
Hatchy: a .pat file for this import
This section is about our own tool (3dshouse makes it). Hatchy writes a .pat file from a library pattern, with a Revit model pattern or Revit drafting pattern choice that sets the matching type and units lines; 3 .pat downloads per UTC day are free, more need Hatchy Pro. Its header follows the layout of the revit metric.pat that ships with Revit, and we have not yet run a Hatchy file through Revit’s own import dialog, so test one before you rely on it.
Skipping the file: Motif writes patterns into the project
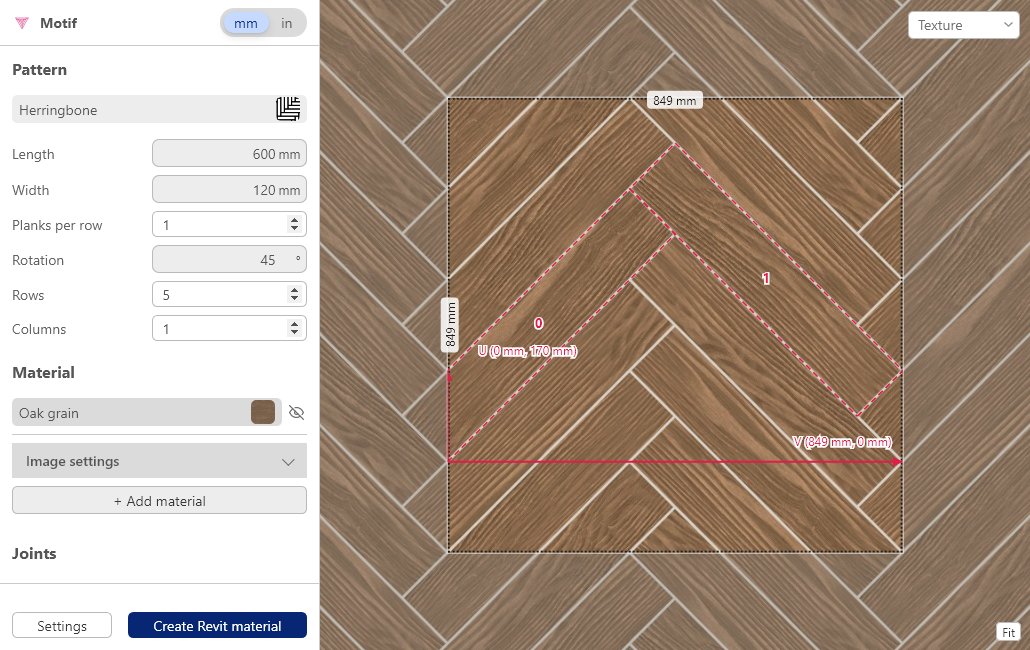
This section is about our own add-in. Motif runs inside Revit on Windows and puts a library pattern into the open project with no .pat file. Under Settings, Add to Revit as chooses the destination:
- New material (button Create Revit material): a material with a seamless texture, a Surface pattern and a Cut pattern drawn from the same layout, so hatch and texture match; a material of the same name is replaced.
- Existing material (button Set patterns on material): sets the Surface and Cut patterns of a material already in the project and keeps its appearance.
- Fill patterns only (button Add fill patterns): adds the drafting and/or model version (Fill pattern type: Drafting, Model or Both) with no material and no .pat file, ready to pick in a filled region, on a painted surface or in any material’s Graphics tab.
A pattern you made yourself is never modified: if its name is taken, Motif adds its own with a numbered suffix such as (2). Which type each use needs is covered in the drafting and model pair for filled regions and materials; the steps by hand for a material are in how to create a material in Revit.
Limits: Windows only; built for Revit 2021 to 2026, tested on Revit 2023; the add-in is not digitally signed yet, so Revit shows a “Security – Unsigned Add-In” dialog (choose Always Load); it needs an internet connection; 3 free uses per UTC day with a free 3dshouse account, asked for at the first use; one use is one result put into the project, whichever destination. More on the Motif page; other ways to get materials are compared in our comparison of Revit material plugins.
Sources (Autodesk pages opened 2026-10-28 and 2026-11-05)
- Autodesk help: About Fill Patterns (2024, opened 2026-11-05)
- Autodesk help: About Drafting Patterns and Model Patterns (2024, opened 2026-11-05)
- Autodesk help: About Fill Patterns for Material Graphics (2024, opened 2026-11-05)
- Autodesk help: Create a Custom Fill Pattern (2025, opened 2026-11-05)
- Autodesk help: Custom Pattern Files (2025, opened 2026-11-05)
- Autodesk help: About the File Format for Fill Patterns (2025, opened 2026-11-05)
- Autodesk help: Apply a Fill Pattern (2025, opened 2026-11-05)
- Autodesk help: Create a Basic Fill Pattern
- Autodesk help: Change the Graphics Properties of a Material (2024, opened 2026-11-05)
- Autodesk help: Change the Appearance of a Material (2024, opened 2026-11-05)
- Autodesk help: Align the Render Appearance to the Surface Pattern
- Autodesk Community: Create a herringbone tile pattern with the mass (2025)
FAQ
What are fill patterns in Revit?
A fill pattern is a repeating layout of lines (a hatch) that Revit draws on materials, filled regions and category overrides. Revit has two kinds, drafting and model (About Drafting Patterns and Model Patterns). A fill pattern is stored in the project file where it was created (About Fill Patterns).
What is the difference between a drafting and a model fill pattern in Revit?
Autodesk: drafting patterns represent materials in symbolic form (sand as stipple) and their density is fixed on the drawing sheet; model patterns represent the actual appearance of an element, such as brick coursing or ceramic tile, and are fixed to the model, so they scale with the view (About Drafting Patterns and Model Patterns).
What does “No “Model” type patterns found” mean in Revit?
It is the answer of the Fill Patterns import when the file holds no pattern of the Pattern Type you picked in the dialog; the twin message is No “Drafting” type patterns found. The type of a pattern is its ;%TYPE line, and a pattern without one is a drafting pattern. Import again with the other Pattern Type, or change the type line. Autodesk Community users also report the message for a model pattern with a zero offset or a missing shift value, so check the descriptor lines too.
Which units does a Revit .pat file use?
The prologue line ;%UNITS=INCH or ;%UNITS=MM sets them. Without it Revit assumes inches, and units in the file are preferred to the Import scale (header of the revit.pat that ships with Revit).
Where do I get Revit hatch patterns to download?
Revit ships sample pattern files (revit.pat and revit metric.pat in its Data folder, acdb.pat and acdbiso.pat in ACADInterop), and any other .pat file can be imported (Custom Pattern Files). Whatever the source, check the type and units lines of the file before you import it.
Why is my Revit fill pattern not showing?
Start with the Pattern Type: No “Model” type patterns found. or No “Drafting” type patterns found. means nothing was imported. If the pattern imported but the drawing shows nothing, or too much, the remaining checks (render versus plan view, cut versus surface, scale, overrides) are in the cut pattern and scale checklist.
Where does Revit store a fill pattern after the import?
Revit’s sample files are revit.pat and revit metric.pat; Autodesk’s 2025 help gives the folder as %ProgramFiles%\Autodesk\Autodesk Revit 2025\Data. Your own .pat can sit anywhere, and Revit does not reference it after import: the pattern is stored in the project (Create a Custom Fill Pattern, Custom Pattern Files).
Is there a Revit fill pattern generator?
Yes: Hatchy writes a .pat file from a library pattern, with a Revit model or Revit drafting choice; it does not draw freehand.
Free: limited to 3 uses a day
Pro: unlimited, guaranteed to work, priority support