Tiếng Việt
SketchUp
Join Lines Into One Polyline in SketchUp Instantly — Weld Edges, No Plugin
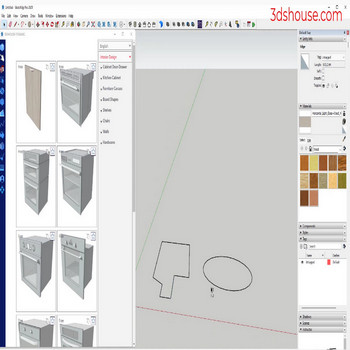
Merging disconnected edge segments into a single polyline entity is one of those SketchUp fundamentals that seems trivial until you realize how much friction it removes from everyday modeling. The operation — called Weld Edges since SketchUp 2020.2 — converts any chain of connected edges into a single Curve entity, which SketchUp treats as one selectable, one-click path. Before this native command existed, modelers relied on the third-party Weld extension (by Rick Wilson / TIG) to accomplish the same thing. Both approaches produce an identical result: a grouped sequence of edges that behaves as a single polyline for tools like Follow Me, Offset, and Scale.
Why does this matter in practice? Imagine tracing a complex floor plan from a DWG import, or building a sweep profile from dozens of individually drawn arcs and lines. Without welding, Follow Me forces you to pre-select every segment of the path before clicking the profile — one missed edge breaks the extrusion. A welded curve collapses that multi-step selection to a single click. The same applies when you offset a path, create a smooth camera orbit in Layout, or feed geometry into a plugin that expects a clean loop. Polylines are also the geometry type that CleanUp³ and similar tools recognize as intentional — so welding prevents your edges from being merged with adjacent face geometry during optimization passes.
This post covers the complete workflow: when welding works, when it silently fails and why, how to troubleshoot the most common pitfall (the shared-vertex requirement), and several non-obvious uses that most SketchUp tutorials skip entirely. Whether you are on SketchUp 2021+ using the native command or on an older version using the Weld extension, the underlying behavior is identical — the differences are only in where you find the command.
Key Features
-
Native command since SketchUp 2020.2 — no extension needed.
Starting with SketchUp 2020.2, Weld Edges is built into SketchUp as a native command. Select connected edges, right-click, and choose Weld Edges. On older versions the free Weld extension (available on Extension Warehouse) provides the same behavior — the resulting Curve entity is indistinguishable between the two methods. -
Produces a SketchUp Curve entity, not a new geometry type.
The welded result is a standardSketchup::Curveobject — still made of individual edge segments, still living in the same Entities context, carrying no face of its own. The difference is that the Ruby API (and SketchUp’s own tools) can queryedge.curveto get the parent curve and treat the whole chain as one unit. Exploding the curve with Edit > Explode Curve returns each segment to being a plain, independent edge. -
Follow Me path selection collapses from N edges to 1 click.
This is the most impactful day-to-day benefit. A welded path can be selected with a single click for Follow Me, so you never have to triple-click, box-select, or Shift-click each segment. The extrusion follows the full curve automatically, including curves made from dozens of short arc segments. -
Welding respects geometry boundaries — groups and components stay intact.
You cannot weld edges across a group or component boundary in a single operation. All edges being welded must exist in the same Entities context (the same group, component, or top-level model space). This is a constraint, not a bug — it prevents the weld from silently reaching into nested geometry you did not intend to affect. -
A single edge cannot belong to two curves simultaneously.
If you try to weld a set of edges where one segment is already part of an existing curve, SketchUp will either refuse the weld or silently include only the un-welded segments. The fix is to explode the old curve first (right-click > Explode Curve), then re-weld the full intended path. -
Shortcut assignable — zero default keyboard shortcut.
Unlike most core tools, Weld Edges ships with no keyboard shortcut. For high-frequency users this is worth fixing immediately: go to Window > Preferences > Shortcuts, search “Weld,” and assign a key (for example W if you have remapped the default Walk tool, or a function key). The Weld extension from Extension Warehouse also lets you run the command from the Extensions menu and add a shortcut there.
How to Install and Use
Using the Native Command (SketchUp 2021 and later)
-
Open your model and enter the correct context.
If the edges you want to weld are inside a group or component, double-click to enter edit mode first. Weld only works within a single Entities context. -
Select all edges in the chain.
Use a left-to-right box select, Shift-click individual edges, or triple-click a connected chain to select all attached geometry (then Shift-click to deselect any faces if you do not want them included — faces in the selection are ignored by Weld, but it is cleaner to exclude them). -
Right-click the selection and choose “Weld Edges.”
The command appears in the context menu only when at least two connected edges are selected. If you see “Weld Edges” grayed out or absent, at least one selected edge shares no endpoint with another — see the troubleshooting section below. -
Verify the result.
Click away to deselect, then single-click any segment of the former chain. If welding succeeded, the entire chain highlights as one selection. The Entity Info panel will show “Curve” (not “Edge”) as the entity type, confirming the weld. -
Assign a shortcut (optional but recommended).
Go to Window > Preferences > Shortcuts, type “Weld” in the filter box, click the result, and press your chosen key combination in the “Add Shortcut” field.
Using the Weld Extension (SketchUp 2020 and earlier, or as an alternative)
-
Install from Extension Warehouse.
In SketchUp go to Extensions > Extension Warehouse, search “Weld,” and install the extension by Rick Wilson (also published by TIG on SketchUcation). It is free. Restart SketchUp if prompted. - Select your edges exactly as described above, then go to Extensions > Weld (the menu name may vary by version) or use your assigned shortcut.
- The extension runs silently — there is no dialog. The edges are welded in place and the selection updates to show the new curve. If nothing appears to change, check that all edges share endpoints (the extension also enforces the shared-vertex rule).
Unwelding (Exploding a Curve back to individual edges)
- Select the welded curve (single click selects the whole curve).
- Right-click and choose Explode Curve. Each segment reverts to an independent edge. There is no undo state between weld and explode — both are reversible with Ctrl+Z immediately after performing them.
Pro Tips
-
Use “Select Connected Edges” before welding imported DWG paths.
When you import an AutoCAD DWG, lines that look like a continuous polyline often arrive as hundreds of separate edge segments. Right-click any single edge and choose Select > Connected Edges (available via the right-click menu in SketchUp Pro with connected geometry) to highlight the entire chain instantly before welding. This is far faster than box-selecting and deselecting faces. When the path you need exists only as a logo or a photographed drawing, convert that image into a DXF outline with Tracepen first, import the DXF, then weld it the same way. -
Weld before using Follow Me on curved paths.
If your sweep path is made of arcs and lines — for example, a handrail that curves then runs straight — weld the entire path before invoking Follow Me. Without welding, Follow Me on a partial selection produces an extrusion that stops at the last selected edge rather than completing the path. After welding, a single click on the curve selects the full path regardless of how many arc segments it contains. -
The gap test: zoom in before concluding edges are connected.
The single most common reason Weld Edges fails silently (no error, but the curve does not form) is a tiny gap between endpoints that looks connected at normal zoom. Zoom to the apparent junction point and look for a gap. Alternatively, use Window > Model Info > Statistics > Fix Problems or the Merge Coplanar Faces tool to close near-gaps before welding. CleanUp³’s “Merge Connected Coplanar Faces” also helps but operates differently — it is not a substitute for fixing gaps. -
Welded curves survive Intersect Faces — individual edges often do not.
When you run Edit > Intersect Faces, SketchUp can split individual edges at intersection points, fragmenting a path you built carefully. A welded curve’s individual edges can still be split by Intersect Faces, but because you can re-select the resulting segments quickly (they remain visually grouped until actually split), it is easier to re-weld the post-intersect path than to reconstruct it from scratch. -
Combine weld with the Pipe Along Path plugin for one-click conduit modeling.
Plugins such as Pipe Along Path (or similar from Extension Warehouse) require a single-entity path as input. Welding a complex routed path — elbows, straights, vertical drops — into one curve before running the pipe plugin prevents the common “only the first segment was piped” failure. Weld first, then pipe.
System Requirements
- Native Weld Edges: SketchUp 2020.2 or later. Available on both Windows and macOS.
- Weld Extension: SketchUp 2017 or later (tested; may work on older versions). Free on Extension Warehouse and SketchUcation. Windows and macOS.
- No special hardware required. The operation is instantaneous on paths up to several thousand segments.
- Works in both 32-bit and 64-bit SketchUp installations (64-bit recommended for large models).