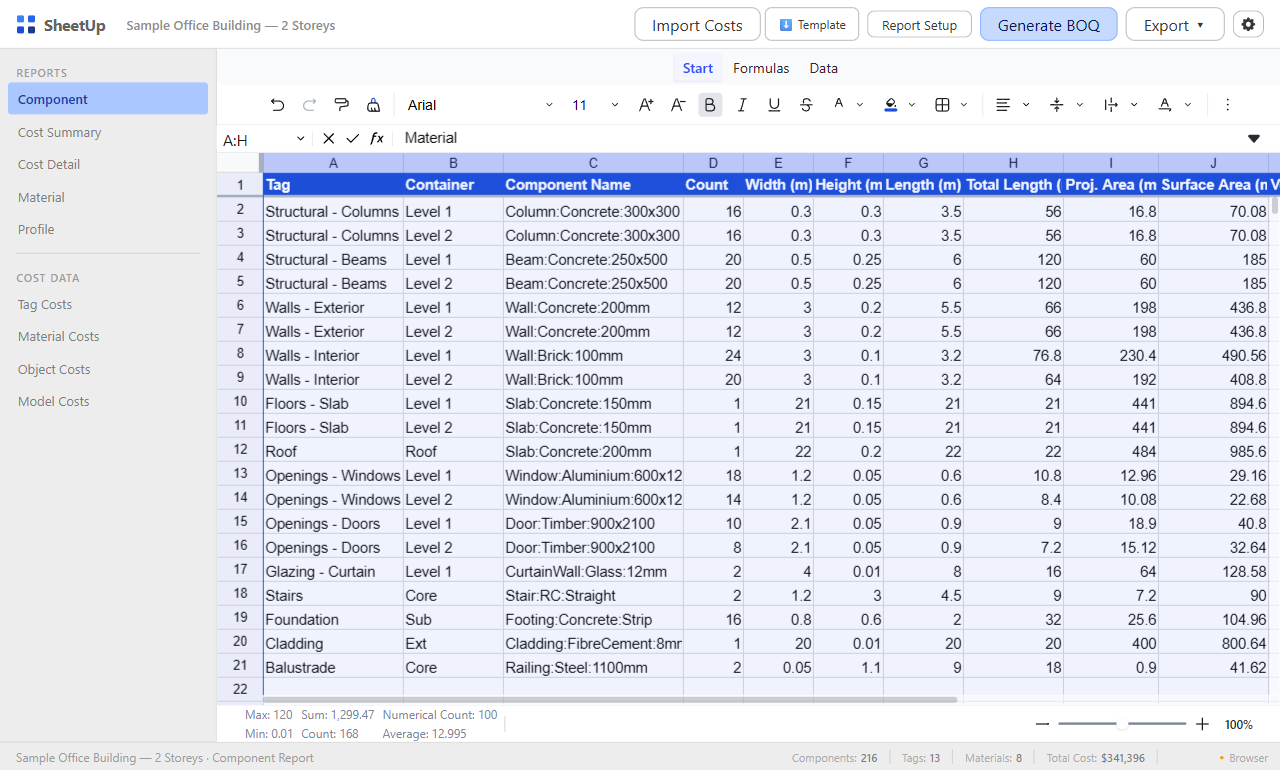
A material quantity is one measurement from the model (a count, a length, a width, a height, a surface area, a volume or a weight), multiplied by a factor that turns it into the unit you order, plus an allowance for waste. SketchUp reads some of these natively, one object or one material at a time. SheetUp works from one table that you fill by hand with Add row: each row points at one component, one material or one tag, measures only that, and applies its own Per measure, Factor, price and waste, so the table ends as an order list instead of a set of readings, with the grand total as its last row. One small model is followed below from measurement to order quantity, arithmetic shown.
Choose the measure that matches how the material is bought
Every row built from the model has a Per cell. Click it and pick an entry from the dropdown: the Price of the row is a price for one unit of that measure, and the Qty cell shows how many units the model holds. Each entry shows the unit of the current system, for example Volume (m³) or Volume (ft³). Pick the measure the supplier prices by:
| Per | What SheetUp measures | Typical use |
|---|---|---|
| Each | Number of instances of the component (for a Material row, the number of faces painted with it) | Doors, fixings, fittings, boards, prefabricated parts |
| Length (m, ft) | Total length: the longest side of the item’s bounding box, times the count | Studs, rails, pipes, trim, anything bought by the meter or foot |
| Width (m, ft) | The smallest side of the bounding box, times the count | Items priced by their narrowest dimension |
| Height (m, ft) | The middle side of the bounding box, times the count | Items priced by their second dimension |
| Area (m², ft²) | Surface area: every face of the item, both sides and the edges, at its placed scale; for a Material row, the faces painted with the material | Paint, render, wrapping, cladding of a solid |
| Volume (m³, ft³) | Volume of a closed solid | Concrete, screed, fill, timber sold by volume |
| Weight (kg, lb) | Volume times a density, from the Density column or from the material name | Steel, reinforcement, aggregates, anything priced by weight |
A new Component or Tag row starts at Each and a new Material row at Area; SheetUp never picks Volume or Weight for you. A Material row offers only Area and Each. A Tag row adds up its components: Length, Area, Volume and Weight are sums, and Width and Height are the sums of size times count over its components.
Width, Height and Length are ranks, not orientations. SheetUp sorts the three sides of the component’s bounding box as placed, so Width is always the smallest side, Height the middle one and Length the longest, whichever way the component stands in the model. The W × H × L column of a Component row shows the three sizes, so read it before you choose. A window of 1.2 x 1.5 x 0.1 m ranks 0.1, 1.2 and 1.5: its Height is the 1.2 m opening width, which is the measure to use if a supplier prices windows per meter of width. One stud component (45 x 95 x 2,400 mm, a closed solid, material Timber, 40 instances) reads as follows under each Per:
| Per | Qty | Check by hand |
|---|---|---|
| Each | 40 | 40 instances |
| Length (m) | 96.00 | 2.4 x 40 |
| Width (m) | 1.80 | 0.045 x 40 |
| Height (m) | 3.80 | 0.095 x 40 |
| Area (m²) | 27.22 | 2 x (0.045 x 0.095 + 0.045 x 2.4 + 0.095 x 2.4) = 0.68055 per stud, x 40 = 27.222 |
| Volume (m³) | 0.41 | 0.045 x 0.095 x 2.4 = 0.01026 per stud, x 40 = 0.4104 |
| Weight (kg) | 246.24 | 0.4104 x 600 (Timber, see the density table below) |
The area is a surface area, which matters most for thin parts. A 12.5 mm board of 5.0 x 2.4 m has 24.19 m² (two faces of 12.0 m² plus 0.185 m² of edges), while the wall behind it is covered by one face. Count the boards (Per Each), take half with a Factor of 0.5 (0.8 % high, because the edges are included), or paint only the visible face with its own material, leaving the group unpainted, and use a Material row. How the volume is derived is covered in how SheetUp measures volume, and the area figures in the area and surface area guide.
Prepare the model so the rows pick sensible items
The names and tags in the model are the names and tags in the pick-lists. SheetUp needs SketchUp 2022 or later.
- Name every group. A component is one tag plus one name. A component instance is listed under its definition name, a group under its own name; unnamed groups on one tag collapse into a single entry called Group. Every named group or component that has faces of its own or nested instances is listed; an empty group is not.
- Tag the group or component itself. SheetUp reads the tag of the instance, not of the faces inside it (the default tag shows as Untagged).
- Choose the source by how you price. A Component row is one item (one tag and name) measured as a whole: its own faces plus everything nested inside it, so a window group made of glazing, sill and head measures as the sum of its parts. A Tag row adds up the own faces of every component on the tag, which suits one material in several sizes at one rate; a part nested inside a component of the same tag is counted once. A Material row takes the faces painted with one material.
- Paint the solid, or its group or component, with a material named for what it is (Concrete, Steel, Timber C24). A face without its own material takes the material of the nearest painted group or component around it, and an item’s weight uses the material covering most of its own face area.
- Make anything you want volume or weight for a closed solid, drawn in the shape that is bought. SketchUp’s help defines a solid as an entity with a finite closed volume, with no missing faces and no faces that do not meet at an edge, and says Entity Info shows whether a selection is one. SheetUp runs its own check on the item’s direct faces (every edge used by exactly two), and a steel section drawn as a solid rectangle weighs as a solid rectangle.
Add the rows in SheetUp
- Open SheetUp from the Extensions menu. The table starts empty and stays empty until you add rows: SheetUp does not list or measure the whole model, and there is no Generate step.
- Press Add row, the button at the left of the bar along the bottom of the window. One popover opens with Custom row, Component…, Material… and Tag…, plus From selection while objects are selected in SketchUp. Custom row adds a row at once (quantity 1, unit item) for what the model does not hold: you type the name, the quantity and the unit. From selection adds one Component row for each distinct component selected.
- For a Component, Material or Tag row, search the list and tick what you need. A click on an entry only ticks its box, and Select all N results ticks everything the search shows. Press Add N selected: all the rows arrive as one undo step. A component entry shows its tag and its number of instances.
- Check Per in each new row: click the cell and pick the measure from the dropdown (see the table above). The Qty cell then shows that measurement, taken from the model and read-only. Changing Per on a row that already has a price keeps the typed number under the new unit, so retype the price after switching, for example from Volume to Area.
- Type the Price per unit shown in Per, then a Factor and a Waste % where the row needs them (next section). A blank Waste % or Tax % uses the Default waste % or Default tax % from Settings, the cog at the right of the top bar. On a row priced per Weight, the Density cell is open for typing (see the density section).
- Read the Total cell of each row, and the Total row at the end of the table for the grand total. The measure columns to the right (Count, W × H × L, Total length, Area, Volume, Weight) show everything measured for each row; the Columns button at the top hides the ones you do not want, and the model remembers the choice. Selecting objects in SketchUp highlights the rows whose component or tag matches, and the quantities re-measure by themselves a moment after the model changes.
The Name of a model row is editable: typing a new name renames the real component, tag or material in the SketchUp scene as one undo step, and the row follows it. If the model already has that name, SheetUp refuses and the cell keeps its old name. In a custom row the name is just text. The Code is generated from the name and editable; its prefix tells the kind of row: CMP- component, MAT- material, TAG- tag, CUS- custom.
Turn the measure into an order quantity: Factor and waste
The same arithmetic runs on every row:
Total = Qty x Factor x Price x (1 + Waste / 100) x (1 + Tax / 100)
Three rules follow. Factor multiplies the measured quantity before the price is applied (2 for a second layer that is not modelled, 0.5 to take one face of a surface area); blank means 1, and 0 gives a total of 0. It does not change the unit: the price is always per unit of Per, so to price a board at 9.50 from an area, convert the price (9.50 / 2.88 m² per board is 3.2986 per m²) or count the boards with Per Each. Waste % raises the money, not the Qty cell, which shows the measured quantity before Factor and waste. SheetUp has no order-quantity column, so the amount to order is Qty x Factor x (1 + Waste / 100), worked by hand or added in Excel from the exported Qty, Factor and Waste % columns. And SheetUp does not round up to whole boards, stock lengths or truckloads. Waste % and Tax % are added in sequence: waste on the subtotal of the row, tax on the subtotal plus waste.
Worked example: from model to estimate
The model is a small outbuilding with five items. Dimensions are in meters; the prices are invented for the arithmetic, so replace them with your supplier’s rates.
- Foundations / Slab: one group, a closed solid 8.0 x 6.0 x 0.2 m, material Concrete.
- Steel frame / Beam: four components, each an I-section modeled as a closed solid, flanges 100 x 8 mm, web 184 x 8 mm, depth 200 mm (section area 3,072 mm²), 6.0 m long, material Steel.
- Timber frame / Stud 45×95: 40 components of 45 x 95 x 2,400 mm, material Timber.
- Linings / Board 1200×2400: 18 plasterboard components of 1.2 x 2.4 x 0.0125 m. One layer is modelled; the identical second layer is not.
- Walls: a group of the interior wall faces, painted Emulsion: two walls of 8.0 x 2.4 m and two of 6.0 x 2.4 m, 4 faces, (8.0 + 8.0 + 6.0 + 6.0) x 2.4 = 67.2 m².
Five rows are added with Add row: the slab, the studs and the boards as Component rows, the steel as a Tag row (every member of the tag at one rate), and the paint as a Material row. The Default waste % in Settings is 10. After choosing Per and typing Price, Factor and Waste %, this is what the rows read:
| Code | Per | Qty | Factor | Price | Waste % | Total |
|---|---|---|---|---|---|---|
| CMP-SLAB-01 | Volume (m³) | 9.60 m³ | 1 | 160.00 | 5 | 1,612.80 |
| TAG-STEEL-FRAME-01 | Weight (kg) | 578.76 kg | 1 | 1.250 | 3 | 745.16 |
| CMP-STUD-45X95-01 | Length (m) | 96.00 m | 1 | 2.100 | blank (10) | 221.76 |
| CMP-BOARD-1200X2400-01 | Each | 18 | 2 | 9.50 | blank (10) | 376.20 |
| MAT-EMULSION-01 | Area (m²) | 67.20 m² | 2 | 1.400 | blank (10) | 206.98 |
| Total row | 3,162.90 |
The Qty cell rounds to the Decimals setting (2 by default). The checks are plain multiplication. Slab: 8 x 6 x 0.2 = 9.6 m³. Beams: 0.003072 m² x 6 m = 0.018432 m³ each, 0.073728 m³ for four, and 0.073728 x 7,850 = 578.7648 kg; the same four beams have a total length of 24 m, so 578.7648 / 24 = 24.115 kg per meter, a figure to compare with a section table (SheetUp has no per-meter column). Studs: 40 x 2.4 = 96 m. Boards: 18 components, Per Each from the start. Paint: 67.2 m².
Row by row, with the waste added on the subtotal of the row:
| Row | Order quantity: Qty x Factor x (1 + Waste / 100) | Total |
|---|---|---|
| Concrete | 9.6 x 1.05 = 10.08 m³ | 9.6 x 160 x 1.05 = 1,612.80 |
| Steel | 578.7648 x 1.03 = 596.13 kg | 578.7648 x 1.25 x 1.03 = 745.16 (745.1597) |
| Timber | 96 x 1.10 = 105.6 m | 96 x 2.10 x 1.10 = 221.76 |
| Plasterboard | 18 x 2 x 1.10 = 39.6 boards, order 40 | 18 x 2 x 9.50 x 1.10 = 376.20 |
| Paint, two coats | 67.2 x 2 x 1.10 = 147.84 m² of coverage | 67.2 x 2 x 1.40 x 1.10 = 206.98 (206.976) |
The Total row reads 3,162.90, and the row totals add up to the same figure: 1,612.80 + 745.16 + 221.76 + 376.20 + 206.98 = 3,162.90. The app shows no subtotal, waste or tax lines; the exported Excel sheet carries them as a block under the table: Subtotal 2,991.22 (1,536.00 + 723.456 + 201.60 + 342.00 + 188.16 = 2,991.216 before rounding), Waste 171.68, Tax 0.00 and Total 3,162.90. The paint price of 1.40 is per m² per coat (a pack at 14.00 covering 10 m² per coat), and the pack count is 147.84 divided by the coverage of one pack, by hand.
Metric and Imperial
The Metric / Imperial switch under Units in Settings changes the display units to ft, ft², ft³ and lb. A price is typed in the unit on screen and stored per metric unit, so switching never changes a total. In Imperial the example rows read 339.02 ft³ at 4.531 per ft³, 1,275.96 lb at 0.5670 per lb, 314.96 ft at 0.6401 per ft and 723.33 ft² at 0.1301 per ft²; the 18 boards are unchanged and the Total row stays 3,162.90. Settings also holds the default waste and tax, the currency, the number format and the decimals.
Weight from density: concrete, steel and timber
Weight is the item’s volume times a density in kg/m³ (lb/ft³ in Imperial). The Density cell of a row priced Per Weight is where you set it. Left blank, it reads auto and SheetUp uses a built-in table matched against the name of the material:
| Name in the material | Density (kg/m³) |
|---|---|
| Concrete | 2,400 |
| Reinforced | 2,500 |
| Steel | 7,850 |
| Timber, Wood | 600 |
| Plywood | 550 |
| Brick | 1,800 |
The table has 20 names (the rest: masonry, iron, aluminium and aluminum, glass, plasterboard, gypsum, stone, gravel, topsoil, water, fibre cement, vinyl). Names are matched on whole words, longest first: Reinforced Concrete uses 2,500, Steel_S355 uses 7,850 and Timber C24 uses 600, while Softwood, Oak and Pine match nothing. For those, or for a product with a datasheet density, type the number in the Density cell: it replaces the table for that row. Typing 7,800 on the steel row gives 0.073728 x 7,800 = 575.0784 kg and a row total of 740.41, instead of 578.7648 kg and 745.16. On a Tag row the typed density applies to every component on the tag, so keep different materials in different rows. The built-in values are generic.
Troubleshooting
The Volume column shows “≈” before the figure
The ≈ means the item’s own faces are not a closed surface, so SheetUp used the bounding-box volume, which overstates anything that is not a plain block (an L-shaped slab, a sloped member), and the weight is estimated with it. Typical causes are a missing face, a hole, or an internal face that puts an edge on three faces. Check in Entity Info whether SketchUp calls the object a solid and repair it; the row re-measures by itself. A row set to Per Volume or Per Weight reads the same estimate in its Qty cell, without the ≈, so check this column first.
The Weight column reads “none”, or a Per Weight row totals 0
The material’s name contains none of the table names, or the faces have no material (the item’s material is then default). Rename or paint the material, or type a number in the Density cell; until then a row priced Per Weight totals 0.
“Not found in this model” or “needs extension update”
A row whose component, material or tag is no longer in the model is kept, shows not found in this model and has quantity 0. Use Change source… in the row’s context menu to point it at the right item. If a banner asks you to update SheetUp, the installed extension is older than the page: update it in Window > Extension Manager and restart SketchUp; Custom rows and exports keep working meanwhile.
Other things worth a second look
- A quantity is double what you expected. Per Area is a surface area, so a thin part counts both sides. SketchUp’s own material Area readout can also count both sides when the material sits on a group or component (forum reports); a SheetUp Material row counts each painted face once.
- A part is counted twice. SheetUp deducts nothing: a Component row measures its nested parts, so a second row for one of those parts counts it again. The Code prefix of each row shows what it points at.
- Different sizes under one tag and name. Count, length, area, volume and weight are summed over every instance, so those totals stay right, but the size shown in W × H × L is that of the first instance, and Per Width and Per Height are that size times the count. Give different sizes different names so each can carry its own rate.
- No hole deduction. A window opening in a wall is not subtracted from the wall’s area or volume, and Profile Builder objects are not supported.
Take the quantities into Excel
Export > Excel (.xlsx) writes one flat sheet named Estimate, one row per row of the table, with Code, Name, Source type, Tag, Count, Width, Height, Length, Total length, Area, Volume, Weight, Qty, Per, Factor, Price, Waste %, Tax %, Total and Density. Units are in the headers, and Per carries the dropdown label, such as Volume (m³). The Total of each row and the totals block are live formulas, so changing a Qty, Factor, Price or Waste % in Excel recalculates them; a header row stays frozen and every column has a filter. SheetUp does not group or present the data: add an order-quantity column (Qty x Factor x (1 + Waste % / 100)) or a pivot table by Tag there, as covered in the material list export guide. CSV, HTML report, Copy to clipboard, Print and Import lines are in the same menu. Excel, HTML and CSV go through the license gate (the number of free exports and whether it asks you to sign in are set by the server); Copy, Print and Import do not.
What I could not check
- The example was calculated by running SheetUp’s own scan, row and formatting code on the model described, not by clicking through the dialog on a real SketchUp file; the Imperial figures come from the same display code, and the screens, labels and exports described here were read in code, not clicked or opened in Excel.
- SketchUp’s help does not say how Generate Report computes Quantity for dynamic components, and only the 2025.0 release note was opened for Entity Info volume, so nothing more is claimed about either.
- Waste allowances, paint coverage and pack sizes depend on trade, product and supplier; none is recommended. Whether a supplier prices anything per meter of width or height is the reader’s own case: the example numbers are invented.
Sources
All pages opened on 2026-11-10.
- SketchUp Help, Modeling Complex 3D Shapes with the Solid Tools
- SketchUp Help, SketchUp Desktop 2025.0 release notes
- SketchUp Help, Using SketchUp’s Generate Report Service
- SketchUp Help, Calculating Material Area
- SketchUp Community, Calculate surface area of components for paint coverage?
FAQ
Can SketchUp calculate volume?
Yes, for solids: SketchUp defines a solid as an entity with a finite closed volume, and Entity Info shows whether a selection is one; since 2025.0 it also shows the total volume of selected solids. In SheetUp, a row set to Per Volume reports the volume of a closed group or component, and uses the bounding box for open geometry, marked with ≈ in the Volume column.
How do I find the area of a material in SketchUp?
Context-click the material and choose Area > Material for the total area of the faces using it. Forum users report that both sides are counted when the material sits on a group or component. A SheetUp Material row gives the area of the faces painted with that material, each face once.
How do I get a list of components and quantities from a SketchUp model?
SketchUp’s Generate Report service has a default Component Quantities template that lists component names and the quantity of each definition, downloadable as CSV. In SheetUp you press Add row, choose Component…, tick the components you want and press Add N selected; each row measures count, length, width, height, area, volume and weight, and the Excel export is one flat sheet with a row per component.
How do I get a paint or finish quantity from a model?
Use surface, not volume: add the finish as a Material row (Per Area) or the object with Per Area. Turn the manufacturer’s price and coverage into a price per m² (or ft²) per coat, put the number of coats in Factor and your own waste percentage in Waste %; Qty x Factor is then the area to cover, and you divide it by the coverage per pack yourself.
Free: limited to 3 exports a day
Pro: unlimited, guaranteed to work, priority support
- BevelUp — round or chamfer edges into real geometry, in one click
- Decimify — reduce the polygon count of a heavy model
- Tracepen — trace an image into SketchUp faces
- TileUp — turn a face into real 3D tiles, with a take-off
- Texturic — make seamless tile textures with PBR maps
- SheetUp — turn a SketchUp model into a bill of quantities and cost estimate