
 Tiếng Việt
SketchUp
How to Change & Reset Drawing Axes in SketchUp

Aug
SketchUp has the appearance of The Axes.
The Axes make it easier for users to manipulate points by interpolating points, lines and objects.
In this tutorial, 3dshouse would like to show you “How to change, reset Axis in Sketchup”.
These steps are identical in every modern release through SketchUp 2026 (desktop and the free web version), and they work the same whether you are on a subscription or an older perpetual install. One detail almost nobody notices: each colored axis is solid on one side of the origin and dotted on the other — the solid half is the positive direction, so “red” alone is not enough to know which way you are inferencing.
Understanding the SketchUp Drawing Axes
SketchUp uses a three-axis coordinate system — red (X), green (Y), and blue (Z). These are your spatial reference for every inference, push/pull, and measurement in the model. The global axes live at the world origin (0, 0, 0) by default.
Two things most tutorials skip:
- The solid half of each axis is the positive direction. The dotted half is negative. Knowing this matters when you type coordinates or use the Tape Measure tool.
- The sun and shadows engine reads the global axis orientation as true north. A rotated global axis will point your shadow study in the wrong direction even if you set a correct geo-location and time.
To toggle axis visibility: View > Axes (or right-click any axis line and choose Hide). You can also show or hide axes from Tools > Axes.
How to Change Axis in SketchUp — Move
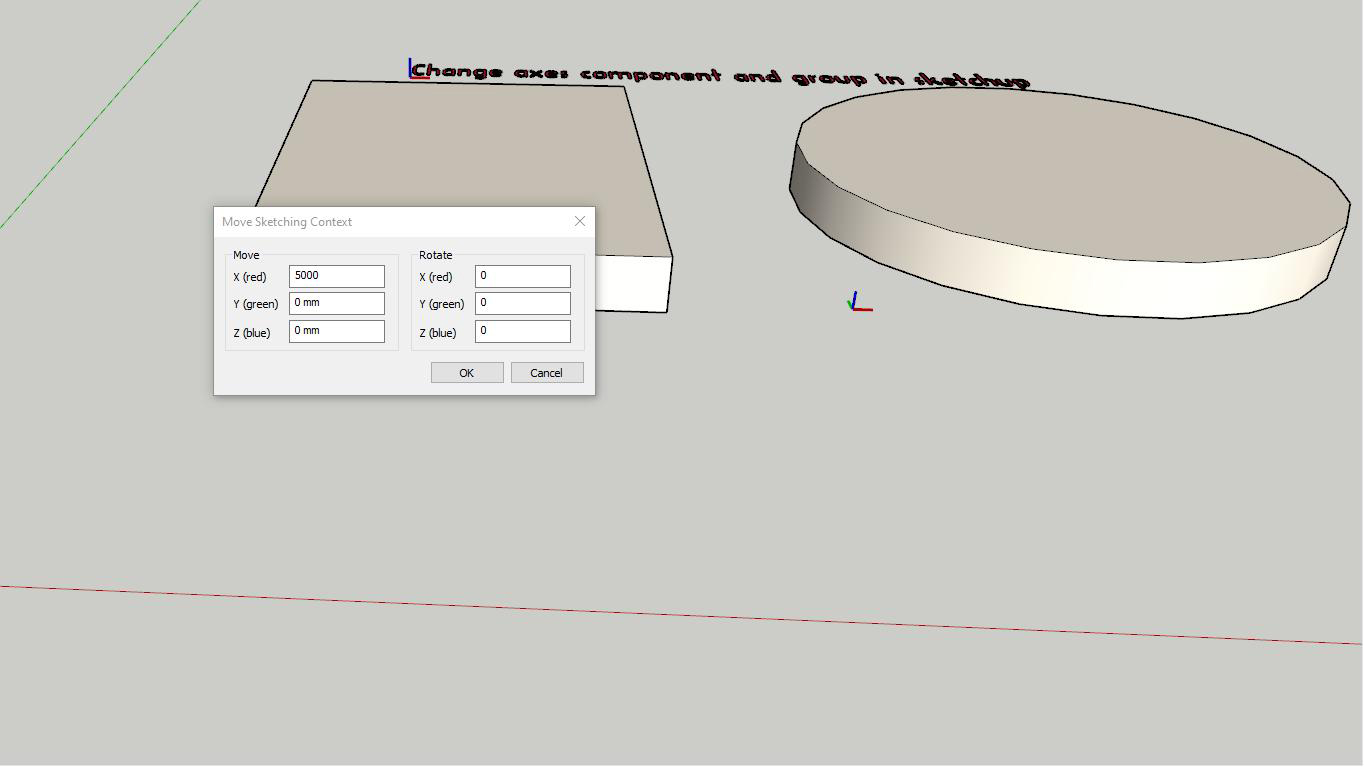
Use Move when you want to shift the axis origin to an exact coordinate offset without re-orienting the axes.
- Right-click an empty area on any axis line. Do not click geometry — click the axis itself.
- Choose Move from the context menu.
- In the Move Sketching Context dialog, type the distance and rotation for each axis (red/green/blue correspond to X/Y/Z).
- Click OK. The origin shifts by the values you entered.
This is useful when you received a model whose origin is far from the geometry and want to pull it closer without touching any faces.
How to Change Axis in SketchUp — Place (Re-Orient)
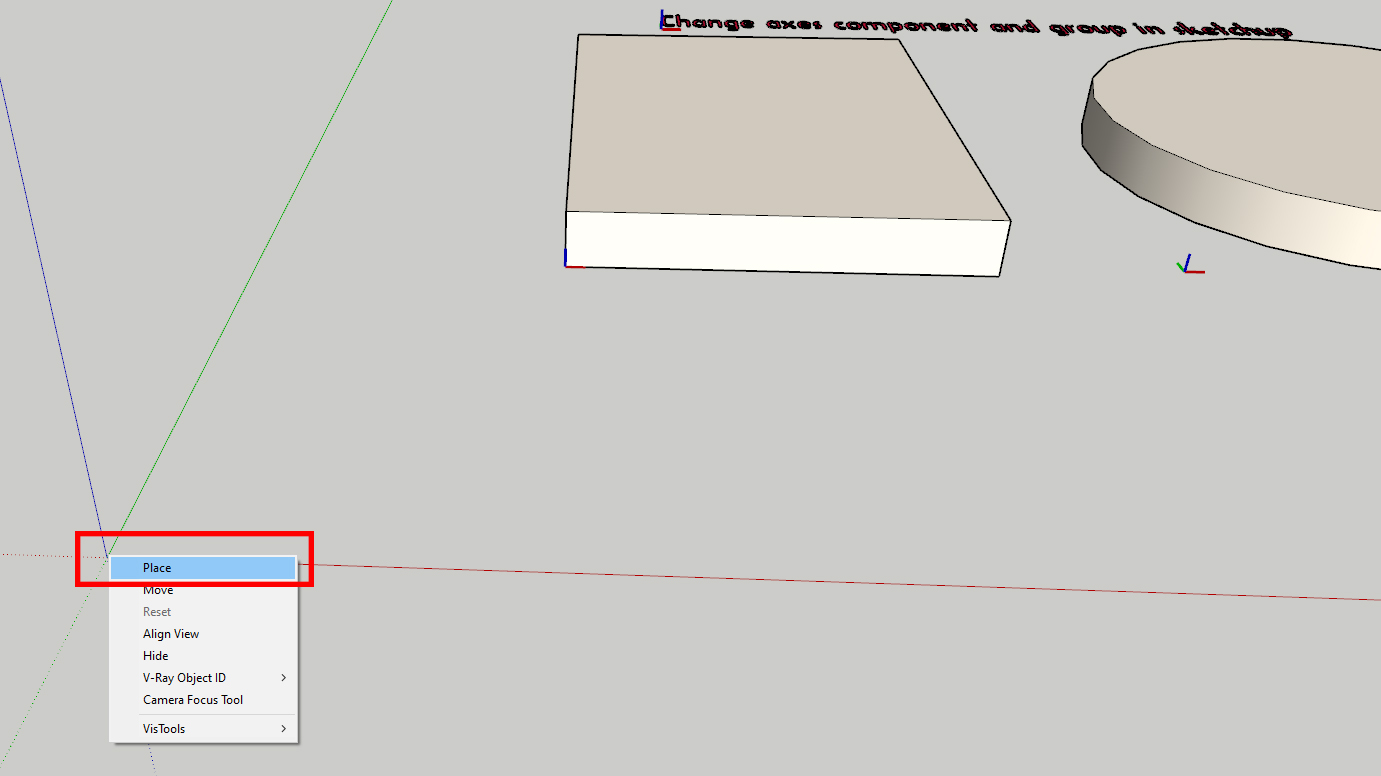
Place lets you pick a new origin and re-orient the axes to match any angle in your model. This is the method to use when working on a sloped face or a rotated building footprint.
- Right-click on the origin point (the intersection of all three axes) and choose Place.
- Click the corner or point you want as the new origin. A dotted red and green axis extends from your cursor.
- Move your cursor to set the red axis direction, then click.
- Move again to set the green/blue tilt, then click to confirm.
Faster shortcut: Activate the Axes tool (Tools > Axes) and double-click any point to drop the axes there instantly. Single-click sets the origin, the second click sets the red direction, the third sets the green/blue tilt — re-orienting onto a sloped face in one fluid motion.
Reset Axes in SketchUp — Back to World Default
To reset axes in SketchUp back to the default world orientation, right-click an empty spot on any axis line and choose Reset. The axes snap back to the world origin instantly.
A few things to know about the reset axes sketchup workflow:
- Reset only appears in the context menu after you have moved the axes. If the option is greyed out, the axes are already at default.
- You do not need to explode any geometry. Reset is non-destructive — it changes only the display axes, not your model.
- After resetting, run View > Align View (or right-click an axis and choose Align View) to align your camera to the cardinal directions as well.
This is the fastest sketchup reset axis workflow. No dialog, no coordinates — one right-click.
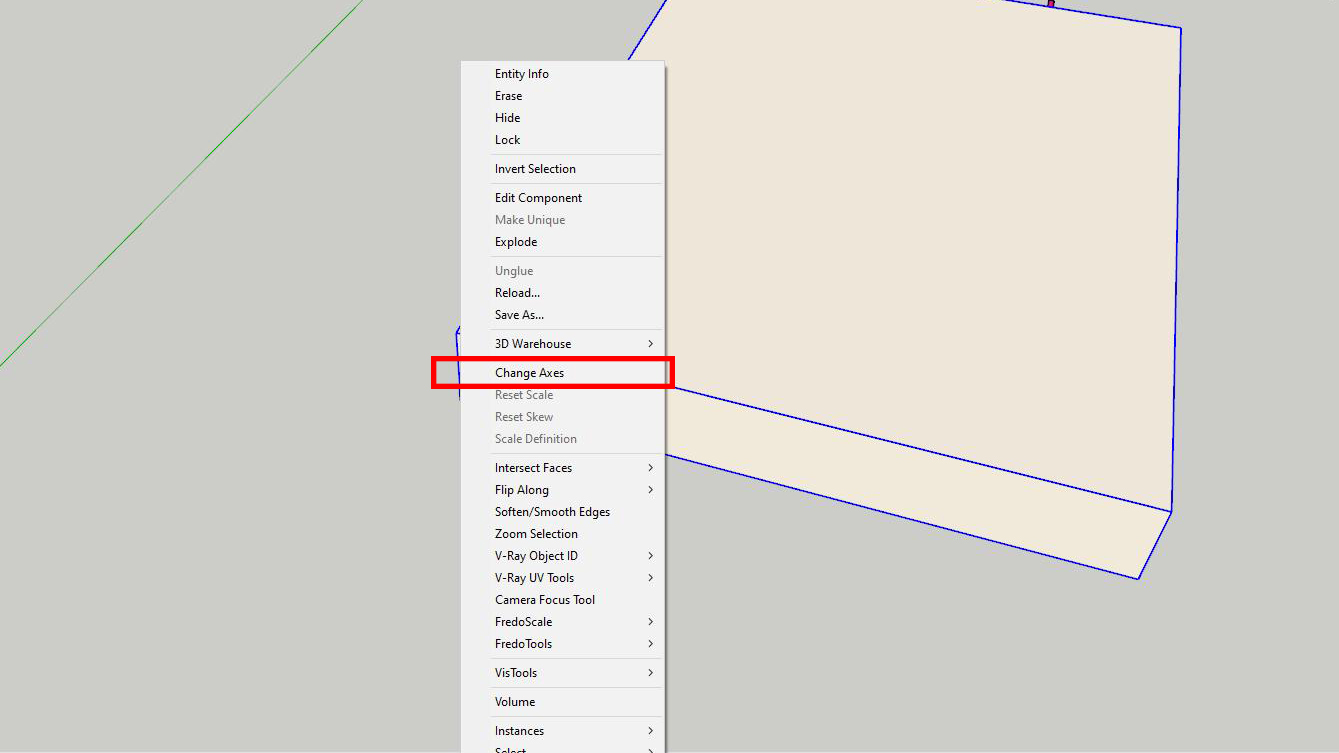
Change Axes of a Component
Each component has its own local axes, separate from the global drawing axes. The component axis origin is also its insertion point — the spot that snaps to your cursor when you place the component from the library. Setting it to a logical base corner makes the component place cleanly every time.
- Right-click the component in the model and choose Change Axes.
- Click to set the new origin, then the red direction, then the green direction. Click to confirm.
- To reset component axes: the only built-in method is to explode the component, then select all, choose Edit > Make Component, and use Set Component Axes in the Create Component dialog to redefine origin, red, and green before clicking Create.
Re-running Change Axes is the correct workflow to fix a misplaced insertion point — exploding and rebuilding is overkill unless you also need to regroup the geometry.
Change Axes of a Group
Groups also have local axes, but they are less stable than component axes — certain operations or converting to a real component can snap a group’s local axes back to default.
- Double-click to open the group for editing.
- Right-click the local coordinate system indicator and choose Place.
- Click to set origin, red direction, and green direction, then confirm.
- To reset a group’s local axes back to default, the only reliable method is to explode the group and recreate it.
Recommendation: if you need a stable local origin long-term, convert the group to a component and set its axes there instead. Group axes are not designed to be relied on across sessions or multi-user workflows.

View Component Axes and Local Coordinate Systems
By default, local component axes are hidden in the viewport. To show them:
- Go to Window > Model Info > Components.
- Check Show component axes.
This makes every component display its local red/green/blue indicator, which is helpful when checking insertion points or debugging placement issues across multiple components.
You can also right-click any axis and choose Align View to rotate the camera so it looks straight down the chosen axis — useful when sketching on non-standard planes.
Shadow Studies and Axis Alignment
This is the most overlooked consequence of axis changes: SketchUp drives sun direction from the global axis orientation. If you rotate the global axes to match a building footprint, your shadow study will be wrong — the sun will rise and set at incorrect angles even after you set a correct geo-location and time.
Best practice:
- Keep the global drawing axes aligned to true north at all times.
- Rotate individual components or use the Rotate tool on geometry instead of rotating the global axes.
- If you have already moved the global axes, use Reset before running any shadow or solar study.
Learn more about solar studies in our guide to using Shadows in SketchUp.
Common Issues & FAQ
For more SketchUp fundamentals, see our tutorials on using the Tape Measure tool and working with components.