
 Tiếng Việt
Jun
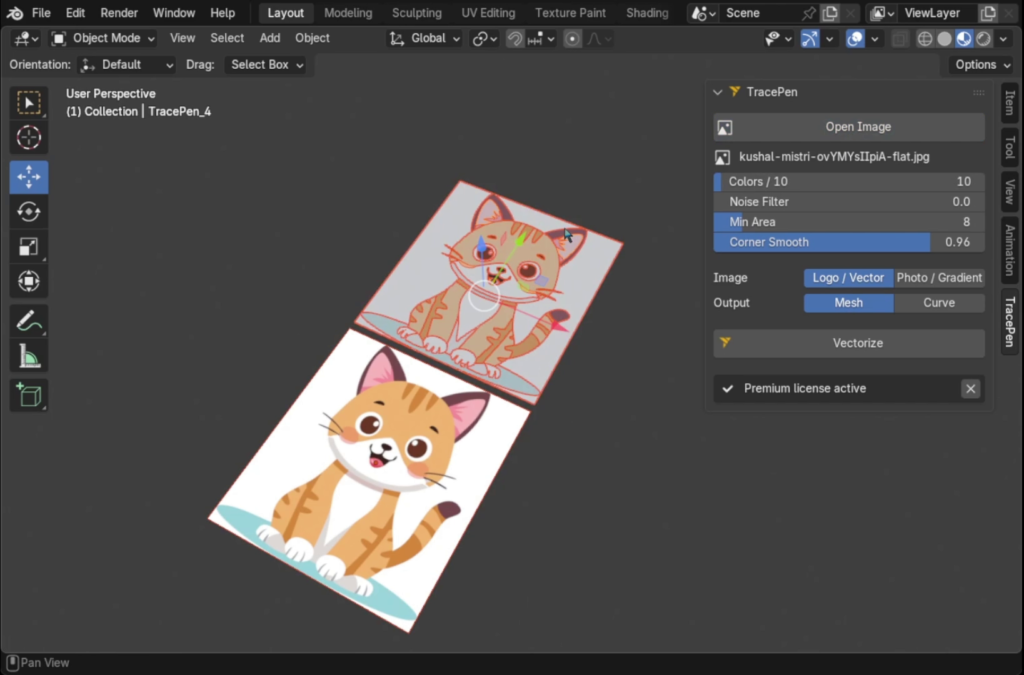
Tracepen converts a PNG or JPG into Blender meshes or editable Bezier curves – each colour becomes its own object inside a TracePen collection, landing in place. A deterministic tracer (no AI), running on an embedded WASM core. Free for 2-colour traces; sign in with a 3dshouse account for full colours.
Video
Features
- Mesh or Curve output – filled faces for modelling, or editable Bezier splines for retopology / motion paths.
- Colour-per-object – each colour is its own object in a TracePen collection, sharing the preview transform.
- Auto colour detection – the colour count is detected when you open an image; tune per-layer noise filter, min area, corner smooth.
- Image-type modes – Logo / Vector preserves the exact palette; Photo / Gradient smooths tonal transitions.
- Runs locally – tracing happens on your machine via an embedded WASM core, no image sent anywhere.
Tips & things worth knowing
A few behaviours that trip people up the first time, and where Tracepen actually saves work:
- The trace is flat – it has zero thickness. Both Mesh and Curve output land as a single plane on Z=0. To get a real solid (for 3D printing, embossing, or a logo sign), add a Solidify modifier to a Mesh result, or for a Curve result set its Geometry → Extrude value – the curve route is non-destructive and keeps the fill watertight while you dial in depth.
- Anti-aliasing is the silent enemy of a clean trace. A “2-colour” PNG saved from a browser or screenshot is often quietly 30+ colours because of the soft, blended pixels along every edge. That inflates the detected colour count and buries the real shapes. Pre-flatten the palette (export as indexed PNG, or run Posterize) before tracing, and lean on Logo / Vector mode plus the per-layer min area slider to drop the speckle layers that anti-aliasing creates.
- Stacked colours all sit on the same plane, so faces can Z-fight. Because every colour object shares one transform on Z=0, overlapping fills (text on a coloured badge, say) render as flicker in the viewport and in renders. Nudge the lower layers a hair on Z, or switch them to Curve + a small extrude so each colour occupies its own slice of depth.
- Determinism is the real selling point for production. Re-running the same source image gives byte-for-byte identical geometry – so you can re-trace an updated logo and keep your downstream modifiers, materials and rigs pointing at predictable topology, something an AI vectoriser can never promise.
Tracepen vs. other ways to trace an image in Blender
| Tracepen | Images as Planes | Manual tracing | |
|---|---|---|---|
| Price | Free + Pro | Free (built-in) | Free |
| Output | Mesh or Bezier curve | Flat textured plane | Curve (slow) |
| Per-colour objects | Yes | No | Manual |
| Deterministic (repeatable) | Yes | — | — |
| Runs locally | Yes | Yes | Yes |
Note: in recent Blender releases “Images as Planes” is no longer an add-on you enable – it ships built in under Add → Image → Mesh Plane. It only creates a textured plane, not real traced geometry. Comparison reflects publicly available information in 2026; check each vendor for current pricing.
Install
- In Blender: Edit → Preferences → Get Extensions.
- Click the ▾ dropdown (top-right) → Install from Disk and select the
tracepen.zip. - Open the TracePen tab in the 3D Viewport sidebar (press N). Sign in for Tracepen Blender Pro.
Requirements
- Blender 4.2 or newer (uses the modern Extensions system; on 4.2+ you can also just drag the zip into the Blender window to install).
- Windows or macOS.
FAQ
Can I edit the result?
Yes – Mesh output gives real Blender meshes (Edit Mode, modifiers, Boolean); Curve output gives editable Bezier splines.
Does it use AI?
No – a deterministic tracer. Same image in, same geometry out.
Does it send my image anywhere?
No – tracing runs locally via an embedded WASM core.